Thursday, 31 January 2013

2013 Bestie Bucket List


 Hello Friends,

We meant to get round to posting this blog aaaages ago, but we're just way too busy and important (ahem....).


In Summer 2011, Salt became single again after three years. She tried drowing her sorrows for a while, but when that turned out to be a terrible idea (Who'd have thought it?!), she decided to start doing little things to get her back on track to feeling like herself again and employed the help of Satch (of course) and our friend Jacklin, to come up with a bit of a bucket list for her. However, as Salt didn't, in fact, get round to doing anything on the list, we've decided that there's strength in numbers, and we're going to do it together.


We're calling it our 2013 bestie bucket list but don't worry, we don't have a joint suicide planned in December!

The items range from big and scary to small and lovely, (thankfully, speed dating has been removed too) and we're going to blog about how it's all going throughout the year. Anyone is welcome to have a go at our list, and see if you can beat us, which, as it's the end of January and we haven't started it yet, is probably likely. As we mentioned earlier, we're just too busy and important!


So here it is :)


Write a Novel


Run a Half-Marathon


Knit something 


Bake something you've never baked before


Read a classic novel you've never read before


Watch a film saga in one sitting


Get a tattoo (SO scared!)


Watch a classic film you've never seen before


Learn 3 new songs on an instrument


Start your mornings a different way every day for a month


Learn to draw something you can't currently draw


Send a lovely text to a different person every day for a month


Have a complete makeover


Wimbledon


Drinking match with Daddy Satch (Much harder than it sounds!)


Burn a load of unnecessary old stuff on a bonfire


Put on an AMAZING meal for your friends


Sky Dive


Bake 10 different cupcake flavours


Try on 3 things in a shop you normally wouldn't touch


Get something super weird from a charity shop and wear it out


Walk on custard


Learn wine appreciation/wine tasting


Skinny dipping


Horse riding


Make a fancy dress costume from scratch


Learn to drive (Neither of us have done this, despite Salt trying...)


Have a proper greasy kebab (Satch still hasn't done this, as she was a let down of a student, apparently!)


Buy the stranger in the queue behind you a coffee.


And thats that! 2013 looks like its going to be exciting! What do you reckon? Any take your fancy? We're always happy to hear about your progress and suggestions/recommendations.

Happy New Year,
Salt & Satch

Tuesday, 29 January 2013

Bold Slogan T-Shirts


As Satch already explained in her last blog, we along with our good friend Jacklin, have the most brilliant tradition of making each other Christmas presents.

This stemmed from a time when we were all penniless students, and put in time and effort to show our love for one another instead of money. And even though we are all now employed full-time, and sadly no longer students, this has been a tradition that has stayed, and I certainly don't see my bank account complaining.

So, in the spirit of crafting - we thought we'd share this years gift creations! Satch and I had very similar gift ideas (great minds and all that...) and we're going to try and persuade Jacklin to do a cheeky blog on the gifts she crafted us too.

I got my idea when flicking through a magazine a little while back. I stumbled across a picture of a girl wearing one of those t-shirts with large lettering on them. You know the ones I mean? Some have funny phrases like 'Sex, Drugs and Sausage Rolls' and others just have the same word repeated.

They seemed like the perfect idea - relatively easy to make, and super easy to personalize to the person!


What you'll need:
 - 1 cotton t-shirt in any colour (These were from Primark - £3.50)
 - 1 pot of fabric paint in any colour (£4.95)
 - Roll of Sellotape
 - Old newspaper
 - Scissors
 - A permanent marker
 - Access to a printer and paper!


And here's how to do it.


1. DESIGN
This is the fun bit - pick the words for your t-shirt!
- I tried to think of something witty and personal to the giftee, as well as being a short enough phrase to print on the front of a t-shirt. (As I learnt, the shorter the words, the easier to create a stencil!)
- Once you've decided, get yourself on a computer and open up MS Word. You need to print out the words to use as stencils on the t-shirts, so they need to be the same size.
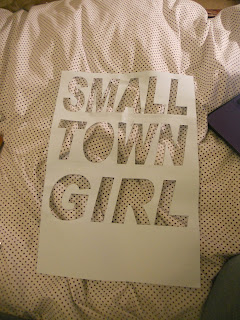
- The way I did this was to do it in Word Art. Pick your font, change it so that it just prints the outline, and select your size. Then copy and paste teh first stencil and just change the wording so the sizing stays consistent.

2. CREATE YOUR STENCILS
- Click print, and start cutting out the letters, making sure to keep any inner bits that you'll need to paint around later.
- I had a bit of trouble getting these neat, so after I'd cut it all out, I strengthed all the corners with sellotape.


3. PREPARE
- A bit of an obvious one, but cover the floor with newspaper as fabric paint is deisgned to paint fabric! I'm also one of the clumsiest people alive, so dressed in clothes I wouldn't mind inevitably being splattered in paint!
- Stick your stencils together, and line them up on the front of the t-shirt, then secure them down with sellotape around the edges.
- Take all your middle bits and pop a bit of sellotape looped round onto the back of each, then secure in place on the T-Shirt.
- Pop a single sheet of newspaper up the t-shirt to prevent any run through.


4. PAINT AND CREATE
- Obviously!
- Once finished, let it dry completely (usually takes a couple of hours) before you remove the stencil.
- I then got a black fabric marker and wrote around the letters to neaten up the edges, and give it a comical comic book look!


And here are the finished products:


To be honest, I'm really very chuffed with them, and they went down a treat!
The inside jokes made all the difference, and added that lovely personal touch!

Happy Birthday Satch!

Hello everyone!

Salt here! I know its been a little while since I've posted on here, but as I'm sure many of you know, today is Satch's birthday!
(If you didn't know this, then why not? She'll be very dissappointed! Best buy her a large gift to make up for it...)

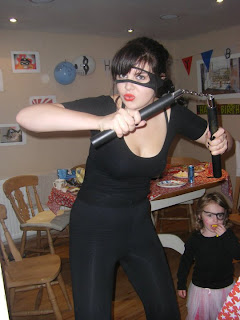
I couldn't let the day pass without commemorating it in blog form, and what better way to do it than by combining Satch's two great loves - her own birthday, and a good old fancy dress party!

And so here, you can follow me on a little trip down memory lane of all the best (and worst) fancy dress costumes the two of us have shared.

Please be warned, before reading any further, that we were young in some of these pictures. We only discovered how to use make up properly at the age of 18 apparently...


HAPPY 22ND BIRTHDAY, SATCH!

Here's to many more years of friendship, fancy dress and blogging.
Love you always.

Wednesday, 16 January 2013

Bleach-Painted T Shirts


Hello Friends


Satch here – a very happy 2013 to you all! I had a bit of a crafty Christmas this year so there will be another blog or two following this one in the festive vein. I know it’s January, but let’s keep the spirit alive, shall we?


You may not be aware, but Salt, Jacklin and I have, in recent years, developed a bit of a Christmas tradition where we make presents for each other, instead of buying them. Seeing as I only became employed at the beginning of December, I was very thankful for this tradition this year and they won’t mind me telling you, I did their presents on a SUPER low budget! I nicked this idea off of another blog, but it was so cool I just had to try it and I’m quite happy with the results.


To make one of these bad boys of your own you will need:
A T shirt or Vest top 
A Large Piece of Cardboard
Clothes Pegs
Chalk
Household Bleach
A Glass Bowl
A Sturdy Paint Brush (I ruined 2 of mine doing this!) 

Start by stretching your top around the cardboard and peg it in place. This will stop the bleach from leaking through to the other side, and make it easier to do your design. Then, draw your design onto the top with chalk (which will wash off later). I had a cheeky practise with my designs on paper first. You can rub out the chalk and make changes, but too many lines makes it confusing and you don't want to make a mistake. 

Then, put a bit of bleach in the glass bowl, dip in your paintbrush and go over the design. It should only take a few seconds to come through. It's hard to get it all even so simply go over the patchy bits again until it looks how you want it. However, on Jacklin's top a few of the letters just didn't show up so I over did it and now some of them are a little bit too big: 


After you've finished bleach painting, leave it outside or in a conservatory to get some sun for an hour, so the design fully sets in, and then hand wash it. Then it should be permanent and machine-washable and everything! 

As you can see, the colour of the bleach varies depending on the colour and cotton content of the top. I did another one with a camera design for my cousin Naomi (which I stupidly wrapped up before I took a picture!) on a blue top and the camera turned out pink, but the blog I got the idea from used a blue top and the design came out white, so it's really a guessing game! But the colours are always quite complementary so it works :) 

 Look out for Salt's blog about what she made for us (we ended up with surprisingly similar ideas) and we might get Jacklin in for a guest blog so she can show off about her crafty skills (I'll give you a hint, my present involved cake and darth vader - beautiful!) 

Also, Salt and I are doing a 2013 bucket list this year, which we shall post shortly and keep you updated about our progress. It's gonna be a good year :)