Showing posts with label All Sewn Up. Show all posts

Tuesday, 17 September 2013

No Sew Tank Top


Hey kids, 

Satch here. This top has been aaaaaaaaages in the making so I'm really excited to finally share it with you all (especially considering the fact it turned out much easier to do than I realised!) But first, WE HAVE TWITTER! It's very exciting so do follow us @SatchandSalt. Plus, we're taking suggestions for the bestie bucket list 2014, so give us some great ideas! We'll do crazy stupid things and put them on the internet for your enjoyment, what could be better?

Business over, back to pure crafty pleasure. About a year ago, our friend Glenky left this AWESOME tee at my house to show me, and I instantly fell in love with it: 
This isn't Glenky, it's just a pic of the original tee I leafed off the internet!

It combines all the best things in life - science fiction and famous authors from history - so obviously I proceeded to sneak the tee up to uni with me and hold it hostage until Glenky said I could keep it, what a Gent! 

The problem I then faced was that as Glenky, a regular-sized man, had bought the tee to fit himself and not me, a tiny-sized lady, and so a little customising was in order to make it wearable in public. At the time, I cut off the sleeves and sewed them up, but it was just the wrong side of 80s for me, and so back into the sewing basket it went.

For the life of me, I can't figure out why there's a random grey bit at the bottom of this photo!
Cut to two years later and I've finally discovered a way to make a man's tee into a girl's tank! Hallelujah! 

I've combined ideas from a couple of blogs here, as there are a few ways of doing it. However, to do it my way (which is totally the best) you will need: 

One man's t-shirt (This was a medium, so if you're not a tiny person, you may require a bigger size. 
Scissors
Chalk

- that's it! 

Start with the chalk and mark your tee where you're going to cut it. You're going to need a dip at the neckline (both front and back), as well as cutting off the sleeves and hem. I tried on my tee while I marked it. It may be a good idea to make conservative estimates with the markings, because you can always cut more off but you can't undo it very easily!  

Cut along your chalk markings, but don't throw away the hem you've just cut off! You'll need it later :) Try your tee on again and pinch the back straps together, to get an idea of what it will look like. If it's pulling in too tightly, you may need to cut deeper arm holes and more of a dip at the back - the bottom of these two holes should be in line with each other. Keep adjusting and trying it on until it looks right. 

Once you've got it cut to the size and shape you want, it's time to tie up the back. Try on your tee and pinch the straps together where you want them to join. Then, safety pin the straps in place so you know where to start with your knotting. Take the scrap of hem you saved and thread it under the straps so that there's an even length of material either side of the safety pin. Tie a knot in the hem fabric, and keep knotting downwards until you can no longer knot! (Don't forget to take out the safety pin when you're done.)
Sorry about my foot, folks!

And here it is!

I'm absolutely in love with it (and a little bit in love with Glenky for letting me keep and mutilate his T shirt!) I saw a version of this where they tied a ribbon round the back instead of the same material, which I might try. It takes a little time to get the proportions right, but it's so easy to do that I'm going to proceed to raid the mens' section of charity shops from now on! 

Until next time, 
Satch x


Wednesday, 27 February 2013

How to Give an Old Tee New Life

Hey Kids, 

Satch here. My parents got me a sewing machine for Christmas and now I have given up TV for Lent, I have plenty of time to use it. This means that I've managed to finally do some of the little projects that have been sitting in a pile in my room for months, like this one! 


I bought this T shirt a few years ago and I absolutely love it. It's cute, it's punny and, more than that, it's ironic because I'm actually dairy intolerant! However, it's always been just a little bit too see-through for my taste (why haven't they invented a white T shirt that doesn't do that yet?) and you can't quite see but at the top it has started to go a bit yellowy and gross. However, I wasn't quite ready to throw it away so here's how I gave it a new lease of life. 

You will need: 

One old T shirt with a motif you love
Another T shirt/Vest top (preferably the same colour) 
A Sewing Maching/A needle and thread and a lot of time on your hands! 
Thread the same colour as your chosen Tee. 

Start by cutting out the bit you want to keep from your old tee. This was my first proper go on my sewing machine so I cut out the picture a bit wonky on purpose because I knew it was not going to be perfectly neat! 


Then, pin it to the new tee. Make sure you stretch both pieces of material as much as possible so it doesn't get all bunched up. 


 Then, whack it on your sewing machine and sew it in place. I used a zig-zag pattern so it would hold down the edges and not have any little flaps. If you're sewing by hand, I'd recommend doing a loop stitch but, then again, I'm no expert! Also, fair warning, that will take AGES.


 And hey presto! Even though there was a few patchy areas where it got bunched up and I missed a few stitches, I'm so pleased with the results! (And I don't much care about things looking neat anyway.)

One of a few whoopsies!

The finished product!


What do you reckon? Also, be impressed with my leggings in the photo just above - my 75-year-old Grandma chose them! Isn't she down with the kids?! 

Until next time,
Satch x

Tuesday, 26 February 2013

Shirt Pillow Covers

Hey Kids, 

Satch here. As you're probably aware, we've just survived Valentines Day. Whilst Cobb and I aren't really into it (our anniversary is on Feb 1st so we don't have much need for another lovey holiday two weeks later), I do think Valentines is a good day to show the people in your life how much you care (though you should be doing that all the time anyway!) 

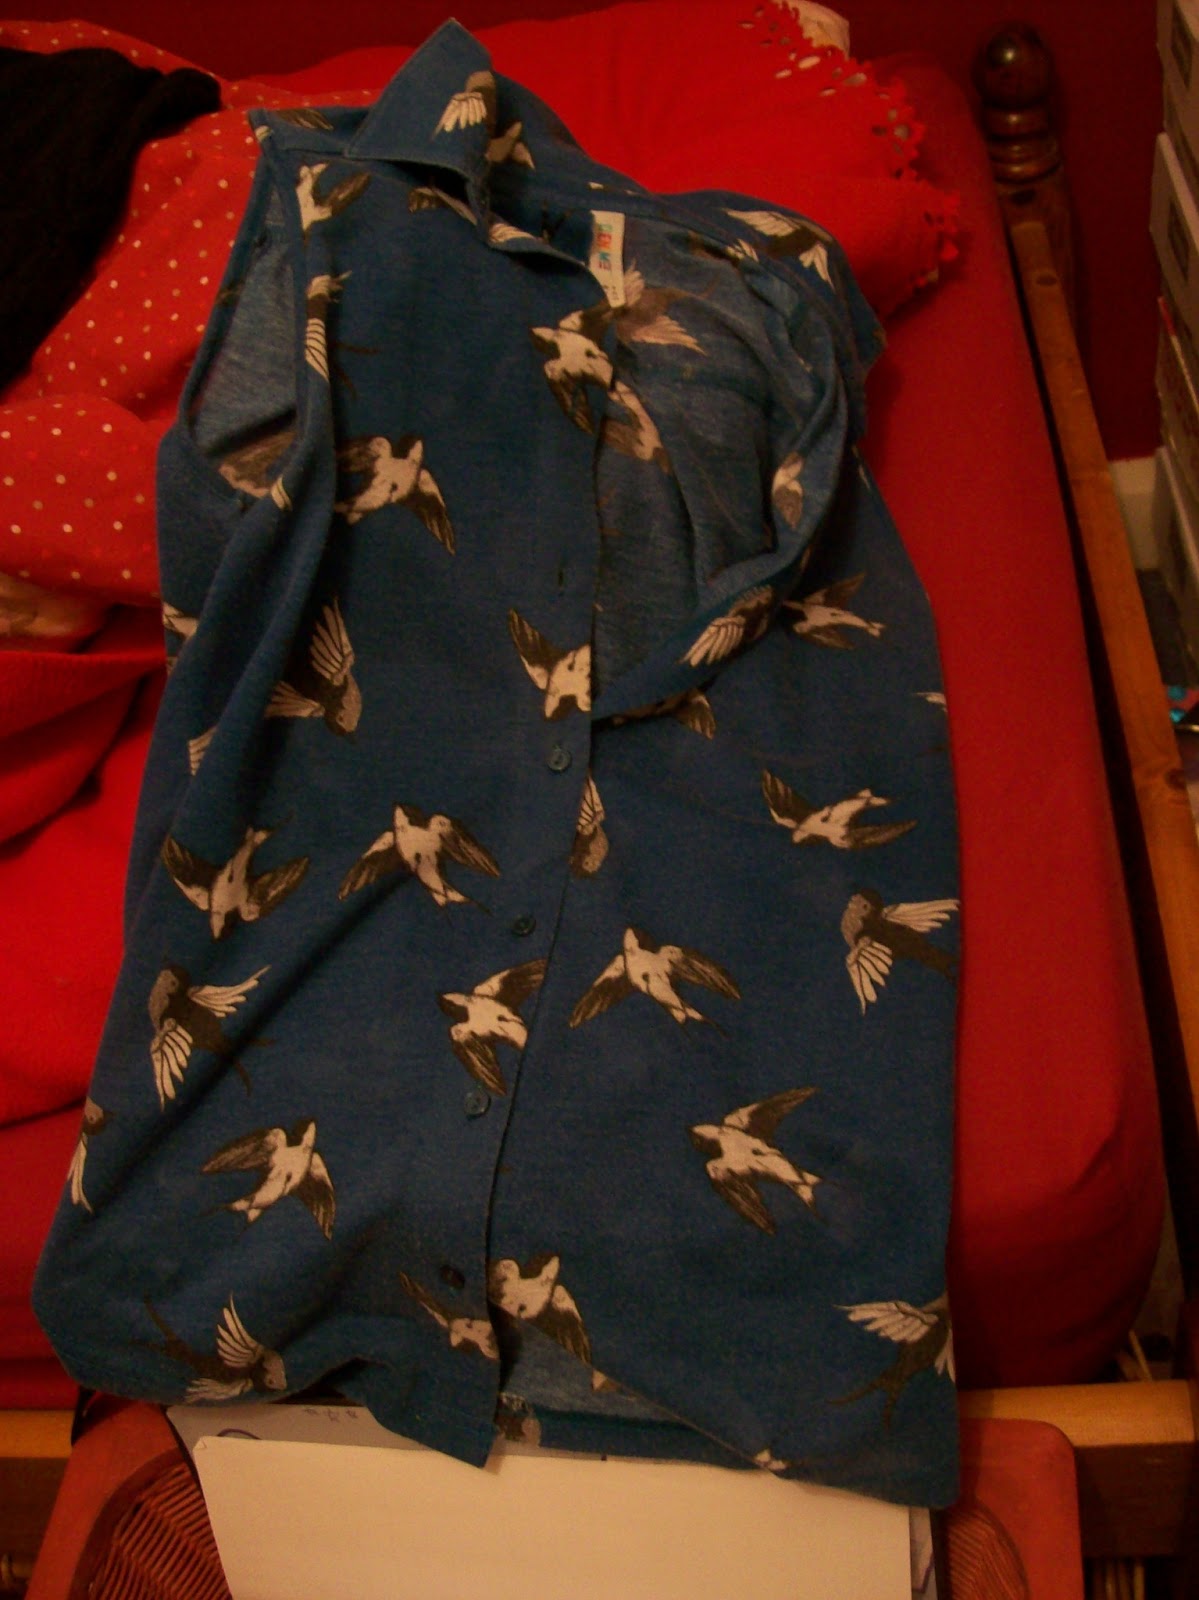
My cousin Nimz has a bit of a thing about swallows. She even has a swallow tattoo, which is why I was so confused when she gave me a bag of old clothes, and this shirt was included. 

She said she'd bought it because she loved the pattern and the colour, but the collar didn't look right and she couldn't make it work. I took it home and looked at it, to see if I could adapt it for her (with half a mind to keep it myself...) but when I realised my sewing skills weren't quite up to scratch to make a new top out of it, I decided to upcycle it into a pillow and give it to her for a Valentines Day treat!

You will need: 
An old button-up shirt
A pillow
A sewing machine / a needle and thread

Firstly, make sure your shirt is big enough to fit the pillow by buttoning it up and shoving the pillow inside. A man's shirt would probably be easier to work with because men are more square than women are, but it doesn't really matter. 

Then, take the pillow out and turn the shirt inside out, making sure the buttons are done up. At both ends, pin the sides together in a straight line, so you make a square. You might want to trim off the extra material at the top and the bottom of the shirt at this point, but I left it on there because there were no sleeves or anything getting in the way, and it gives you more wiggle room if you go wrong! 

Then, sew the sides together in a straight line, as near to the edge as you can manage. 


You can see that my line looks a bit wonky, but this is because the shirt was curved at the bottom, so I sewed in a straight line and then trimmed off the curved bits. 

Do this on both sides, and then unbutton the shirt, turn it outside in, stuff in the pillow and hey presto! 
Because the buttons were already on the shirt, it makes the pillow cover so much easier to make and you can take it off to wash it, if you were so inclined. Nimz was really pleased with it and it genuinely took me more time to change the thread on my sewing machine than it did to actually make the pillow! 

So what do you reckon of my first foray into upcycling? Anyone know how to do it with a shirt that doesn't have buttons? I could not work that out! 

Until next time,
Satch x