Showing posts with label Pretty DIY. Show all posts

Tuesday, 17 September 2013

No Sew Tank Top


Hey kids, 

Satch here. This top has been aaaaaaaaages in the making so I'm really excited to finally share it with you all (especially considering the fact it turned out much easier to do than I realised!) But first, WE HAVE TWITTER! It's very exciting so do follow us @SatchandSalt. Plus, we're taking suggestions for the bestie bucket list 2014, so give us some great ideas! We'll do crazy stupid things and put them on the internet for your enjoyment, what could be better?

Business over, back to pure crafty pleasure. About a year ago, our friend Glenky left this AWESOME tee at my house to show me, and I instantly fell in love with it: 
This isn't Glenky, it's just a pic of the original tee I leafed off the internet!

It combines all the best things in life - science fiction and famous authors from history - so obviously I proceeded to sneak the tee up to uni with me and hold it hostage until Glenky said I could keep it, what a Gent! 

The problem I then faced was that as Glenky, a regular-sized man, had bought the tee to fit himself and not me, a tiny-sized lady, and so a little customising was in order to make it wearable in public. At the time, I cut off the sleeves and sewed them up, but it was just the wrong side of 80s for me, and so back into the sewing basket it went.

For the life of me, I can't figure out why there's a random grey bit at the bottom of this photo!
Cut to two years later and I've finally discovered a way to make a man's tee into a girl's tank! Hallelujah! 

I've combined ideas from a couple of blogs here, as there are a few ways of doing it. However, to do it my way (which is totally the best) you will need: 

One man's t-shirt (This was a medium, so if you're not a tiny person, you may require a bigger size. 
Scissors
Chalk

- that's it! 

Start with the chalk and mark your tee where you're going to cut it. You're going to need a dip at the neckline (both front and back), as well as cutting off the sleeves and hem. I tried on my tee while I marked it. It may be a good idea to make conservative estimates with the markings, because you can always cut more off but you can't undo it very easily!  

Cut along your chalk markings, but don't throw away the hem you've just cut off! You'll need it later :) Try your tee on again and pinch the back straps together, to get an idea of what it will look like. If it's pulling in too tightly, you may need to cut deeper arm holes and more of a dip at the back - the bottom of these two holes should be in line with each other. Keep adjusting and trying it on until it looks right. 

Once you've got it cut to the size and shape you want, it's time to tie up the back. Try on your tee and pinch the straps together where you want them to join. Then, safety pin the straps in place so you know where to start with your knotting. Take the scrap of hem you saved and thread it under the straps so that there's an even length of material either side of the safety pin. Tie a knot in the hem fabric, and keep knotting downwards until you can no longer knot! (Don't forget to take out the safety pin when you're done.)
Sorry about my foot, folks!

And here it is!

I'm absolutely in love with it (and a little bit in love with Glenky for letting me keep and mutilate his T shirt!) I saw a version of this where they tied a ribbon round the back instead of the same material, which I might try. It takes a little time to get the proportions right, but it's so easy to do that I'm going to proceed to raid the mens' section of charity shops from now on! 

Until next time, 
Satch x


Wednesday, 28 August 2013

Cute Jam Jars for Any Emergency

Hello children, 

Satch here. It was recently our friend Anna's birthday, which made for a perfect craft-pportunity! To understand this present, you have to understand three things about Anna Jacklin: 

1. She can never say no to a challenge. 
2. She will never admit when she's ill. 
3. She would rather wear old clothes with holes in/patch things up than buy loads of new stuff. 

With this in mind, I thought I'd give Miss Jacklin everything she needs to cope with her ridiculous lifestyle. Enter, Anna's Supplies for Any Little Emergency: 


I got the idea from another blog, which turned a jam jar into a mini sewing box and made a little pin cushion for the lid. There are different things in each one, so I'll go through them individually. 

For your "Sewing Emergencies" Jam Jar you will need: 

A jar (I keep calling these jam jars but actually the ones I used are mini jars of Dolmio sauce!) 

Cotton wool 

Superglue
 
Material slightly bigger than the lid

A ribbon/piece of lace 

Cream Paint

A label - make it pretty!

Supplies (These can be personalised to fit the sewer in question. Anna has a lot of basic sewing stuff anyway so I just threw in fun things, and a couple of pins, needles and spools of thread. On the right you can see a few different pretty ribbons - wrapped around an old wine cork and a bobbin - buttons and scraps of material). 

If you're using an old sauce jar like me, you'll need to soak it in warm water to get the label off. I stuck mine in the dishwasher, because I'm lazy. 

Start by painting your lid cream. I had to do two coats to cover up the dark green Dolmio logo.

To make the pin cushion, glue your cotton wool balls to the top of the lid (I used cotton pads and it didn't work as well, so go for the balls). Then, cover the wool with your material and glue it down. To hide any messy glue bits, tie your piece of ribbon/lace round the edge of the pin cushion.


Once you've done that, fill the jar with your supplies and stick the pins in the cushion, so the recipient knows what the hell it is! Finish it off by glueing your label on the side, preferably over any sticky residue left by the original label! 


The other jars are a lot easier than the sewing one! The next one I did is full of medical supplies, as Anna can't admit she's ill and so will not have any of this stuff in her house. When she wakes up in the middle of the night with the runs, she'll thank me! 

For your "Medical Emergencies" jar you will need: 


A jar 

A Label (Preferably in the same style as the others) 

Green paint 

Medical supplies (Just make sure you're not giving out dangerous drugs or anything like that!) I used
- Lemsip
- Three kinds of plasters (Plain ones, peppa pig ones and ones with tigers on - plasters should always be fun!)
- Immodium 
- Fybogel (which is the opposite of an immodium!) 
- Paracetemol
- Ibuprofen
- Feminax 
- Antacids
- Soothers  

The process for this one is much the same as the last, just paint your lid, fill you jar and stick on your label!


The last jar is loosely termed "DIY Emergencies" mainly because Anna has been known to do silly challenges in the past, and so will need general build-it fix-it supplies for when she breaks something in the process! 

For this one, you will need: 

A jar

A label 

Blue paint

DIY Supplies. I went with
- Post its
- Elastic bands
- Paper clips
- Tooth picks
- Batteries
- A pencil
- String
- Matches 
- Super glue
- Blu tak
- No more nails strips
- You can't see this, as I ordered it on Ebay and it didn't arive in time, but I also got her a multi-tool thing, kind of like a pen knife, which makes this look a lot more DIY-esque! 

You know what to do! Lid, label and fill her up! 


After I had my jars I decided to put them in a nice box, which I made out of a piece of cardboard and covered with tissue paper. Et Voila!


What do you think? The thing I love about these jars is that they're so cheap to make. The only thing I spent money on was the mutli-tool thing that didn't arrive on time, and the rest I just got from around my house! Ok, so this may not have been a cheap present for my parents...

Plus, there are so many things you could fill them with. If you have a friend who likes to make cupcakes, you could make a jar of little decorations and writing icing pens. Or you could fill jars with someone's favourite sweets or different kinds of tea bags. I also thought of doing ones of hair things/make up, but that would up the price tag a bit! What would you fill yours with? 

Until next time, 
Satch x

Wednesday, 29 May 2013

Instagram Frame

Hello all, Salt here!

Like most other people on the planet Earth, I am a bit obsessed with instagram. In fact, after iPhone-gate (an unfortunate series of events involving two iphones, a theft, and a washing machine), the thing I missed most about having a smartphone, was instagram.

Sure, its slowly getting crowded with pictures of food, which is especially annoying when I'm on a fasting day! And yes, every so often you get spam messages as you would have seen on myspace circa 2007 ("PC 4 PC? - No, I think not!).

But, it makes my mediocre little snaps look lovely, and has given a whole new definition to the word 'Selfie' - shameless, I know.

So when it came around to Laurie and I's first year anniversary, I wanted to find a way of documenting our first year together in a not too girly sort of way. At uni i lived with a boy, whose girlfriend constantly sent him canvases that she'd made, adorned with pictures of the two of them kissing, surrounded by song lyrics, sequins and love hearts. Cute, but in no way is this my style, let alone Laurie's!

It just so happened that Laurie had just moved into his flat in London too, so I wanted to try and incorporate something that he could use to liven up his room, but wouldn't be embarassing and too coupley to display.

Luckily, if there's anyone who loves instagram as much as I do, its Mr Beamont. Admittedly, he mostly takes pictures of his feet and/or tube trains, but occassionally there's nice ones of us on our adventures. Even having not had Instagram for four months of the year, I had plenty of pictures to choose from.

I found the website Printstagram, logged in with my instagram password, and voila, our photos were there for printing! They offer all sorts of products, but I just picked up a set of small square prints. They're 2.5 x 2.5 inches and you can buy 48 of them for $12. In English money, it turned out to be around £15 with shipping added on too.
They warned there could be a three week wait for them, so I left plenty of time, but the little FedEx box arrived on my desk eight days later!


They arrived beautifully packaged, and wrapped up really carefully, so they didn't get bent on the journey. But despite this, I couldn't help opening the packaging there and then and flicking through them at my desk!


They were all perfectly printed and have a really nice matte finish to them. It made my creative juices flare and I thought up so many different things I could do with them, that I nearly ordered another batch there and then!

Next stop was IKEA, to find a frame. I took my time trying to find something that suited the pictures, as well as Laurie's style. I decided on the 'Ribba', which was a bargain at £9.

Then came the tricky part - the actual construction.
I used the white backing paper that came with the frame as a background and removed the cardboard mount altogether.

I then did a quick bit of maths, and worked out that in a 15 x 17.5 inch rectangle, I could fit 42 of my 48 prints.

I drew the rectangle on the backing paper in pencil, and starte sifting through the photos to find my favourites, and put them in a nice order. I tried not to put too many with the same filter together, but thats just me being picky! Have a play and see what works! 
Once I decided on the order of the photos, it was time to stick them down. In hindsight, spray mount would have been more effective, but a good quality Pritt Stick worked well for me.


And voila - the finished product! I'm really chuffed with how this worked out, and will definitely be making one for myself when I'm not moving house every six months! Laurie loved it too, and it looks lovely and homely hanging on his new wall!

Monday, 11 March 2013

DIY Citrus Body Scrub

Hello one and all, Salt here.

As any of you who have read my other blog will know, I'm a sucker for beauty products. One thing I'm not a sucker for though, is the huge price tag that goes with them.

I saw this little recipe on another blog, and decided to tweak it and give it a go myself. I made this for Mummy Salt for Mothers Day, but obviously had to do a little quality control batch for myself too.

Ladies (and Gents) I give you, Lemon and Grapefruit Body Scrub.

Surprisingly simple to make, and honestly, I think it works as well as any branded ones I've paid for recently.

What you'll need:
A jar
Extra Virgin Olive Oil (This can be swapped for an essential oil if you'd rather, but they cost more!)
1 grapefruit
1 lemon
Coarse Sea Salt


 The original recipe calls for:
5 tbsp Salt
1 tbsp oil
1/2 lemon

But this makes a really tiny amount, so I filled the jar with salt, and counted it in tablespoons as I put it in the mixing bowl.

 My jar held 15tbsp of salt, so I adjusted the quantities as follows:

15tbsp salt
3 tbsp oil
1/2 lemon
1/2 grapefruit


First, mix the oil in with the salt. Make sure its all fully coated (add extra if you need). The oil protects the salt from the lemon, so if you skip out this stage, your salt will dissolve and all you'll have is mush, albeit a lovely smelly mush.

I then zested the grapefruit and the lemon to make a more rustic scrub, and to give it a bit of colour.
Then I added the juice of half a lemon, and half a grapefruit and mixed that in with the salt and oil.
I had too much juice, and ended up not using quite a bit of it, so best to do this bit in stages.


Pop it in a jar, tie a bit of ribbon around it, and voila! A lovely homemade gift.
The whole jar must have cost me less then £3 to make too, and it smells so lovely and citrus-y. The shelf life is a little less than your shop bought scrub - about six weeks, but no need to refrigerate.

If you give it a try, let me know how it works! I'd love to try some different flavours!

Tuesday, 26 February 2013

Shirt Pillow Covers

Hey Kids, 

Satch here. As you're probably aware, we've just survived Valentines Day. Whilst Cobb and I aren't really into it (our anniversary is on Feb 1st so we don't have much need for another lovey holiday two weeks later), I do think Valentines is a good day to show the people in your life how much you care (though you should be doing that all the time anyway!) 

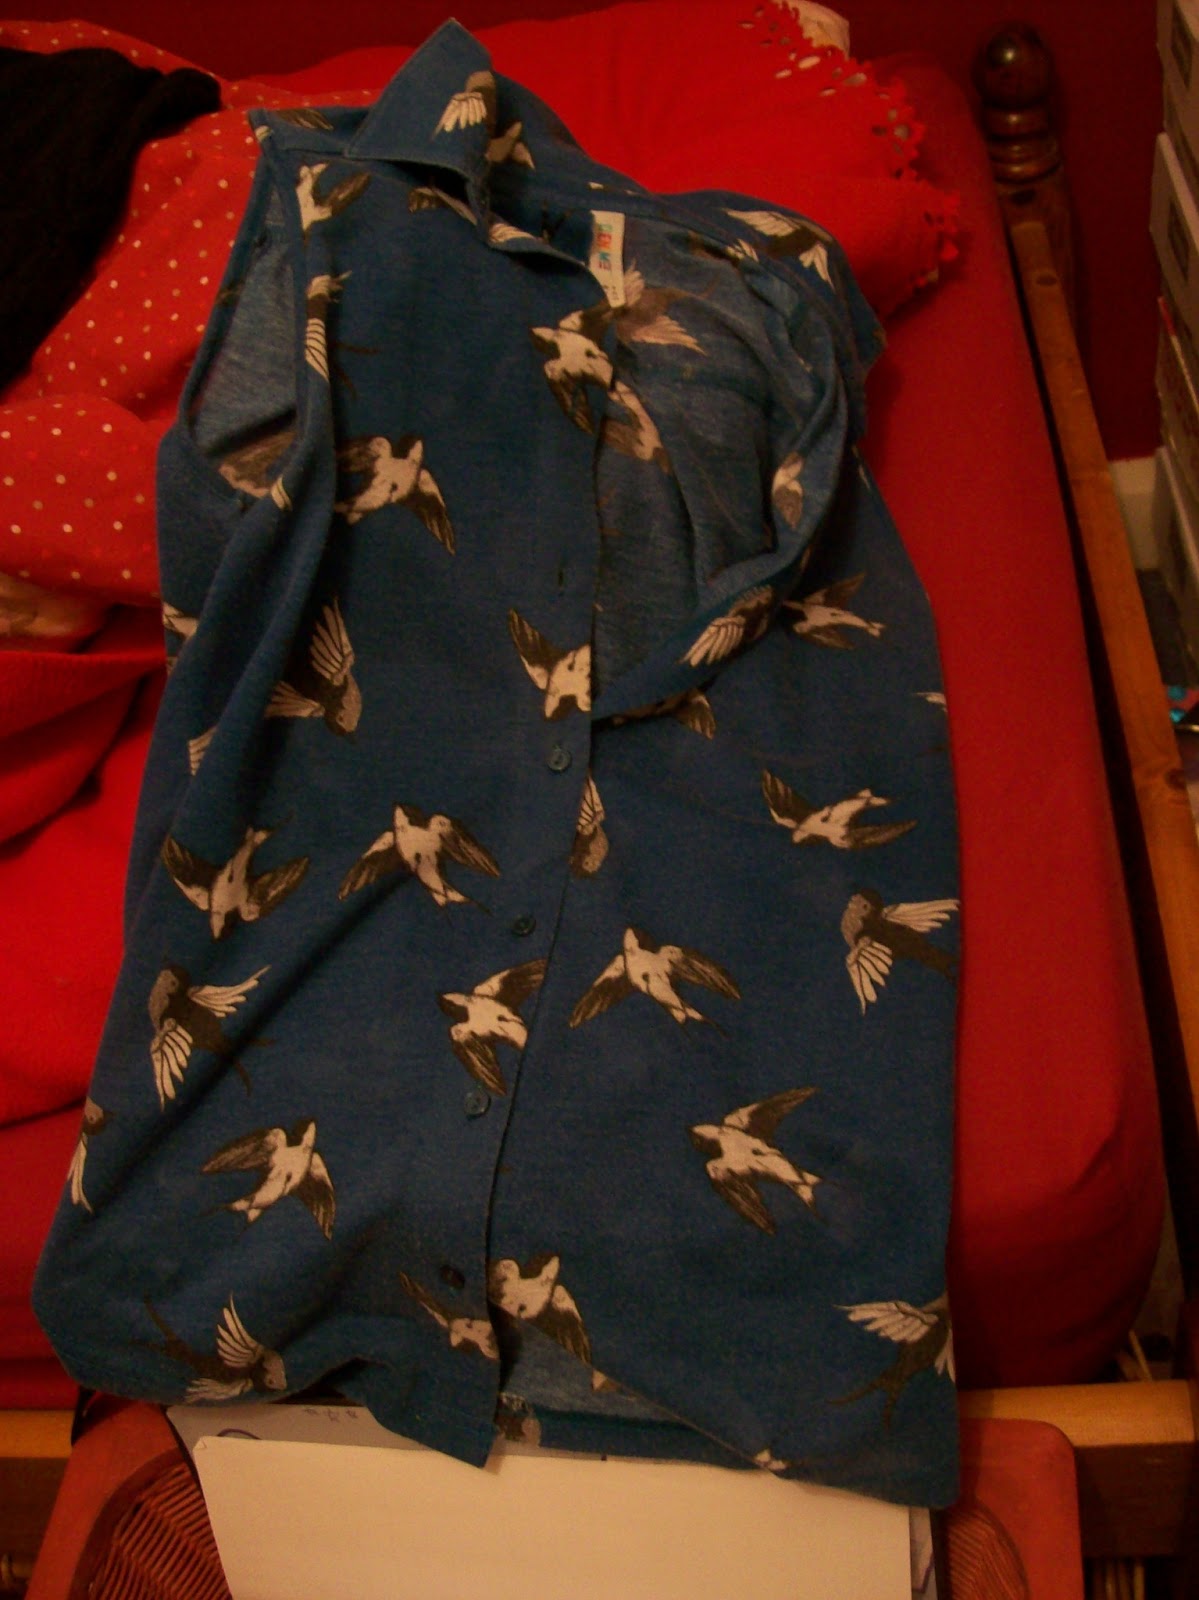
My cousin Nimz has a bit of a thing about swallows. She even has a swallow tattoo, which is why I was so confused when she gave me a bag of old clothes, and this shirt was included. 

She said she'd bought it because she loved the pattern and the colour, but the collar didn't look right and she couldn't make it work. I took it home and looked at it, to see if I could adapt it for her (with half a mind to keep it myself...) but when I realised my sewing skills weren't quite up to scratch to make a new top out of it, I decided to upcycle it into a pillow and give it to her for a Valentines Day treat!

You will need: 
An old button-up shirt
A pillow
A sewing machine / a needle and thread

Firstly, make sure your shirt is big enough to fit the pillow by buttoning it up and shoving the pillow inside. A man's shirt would probably be easier to work with because men are more square than women are, but it doesn't really matter. 

Then, take the pillow out and turn the shirt inside out, making sure the buttons are done up. At both ends, pin the sides together in a straight line, so you make a square. You might want to trim off the extra material at the top and the bottom of the shirt at this point, but I left it on there because there were no sleeves or anything getting in the way, and it gives you more wiggle room if you go wrong! 

Then, sew the sides together in a straight line, as near to the edge as you can manage. 


You can see that my line looks a bit wonky, but this is because the shirt was curved at the bottom, so I sewed in a straight line and then trimmed off the curved bits. 

Do this on both sides, and then unbutton the shirt, turn it outside in, stuff in the pillow and hey presto! 
Because the buttons were already on the shirt, it makes the pillow cover so much easier to make and you can take it off to wash it, if you were so inclined. Nimz was really pleased with it and it genuinely took me more time to change the thread on my sewing machine than it did to actually make the pillow! 

So what do you reckon of my first foray into upcycling? Anyone know how to do it with a shirt that doesn't have buttons? I could not work that out! 

Until next time,
Satch x