Showing posts with label Wear It. Show all posts

Tuesday, 17 September 2013

No Sew Tank Top


Hey kids, 

Satch here. This top has been aaaaaaaaages in the making so I'm really excited to finally share it with you all (especially considering the fact it turned out much easier to do than I realised!) But first, WE HAVE TWITTER! It's very exciting so do follow us @SatchandSalt. Plus, we're taking suggestions for the bestie bucket list 2014, so give us some great ideas! We'll do crazy stupid things and put them on the internet for your enjoyment, what could be better?

Business over, back to pure crafty pleasure. About a year ago, our friend Glenky left this AWESOME tee at my house to show me, and I instantly fell in love with it: 
This isn't Glenky, it's just a pic of the original tee I leafed off the internet!

It combines all the best things in life - science fiction and famous authors from history - so obviously I proceeded to sneak the tee up to uni with me and hold it hostage until Glenky said I could keep it, what a Gent! 

The problem I then faced was that as Glenky, a regular-sized man, had bought the tee to fit himself and not me, a tiny-sized lady, and so a little customising was in order to make it wearable in public. At the time, I cut off the sleeves and sewed them up, but it was just the wrong side of 80s for me, and so back into the sewing basket it went.

For the life of me, I can't figure out why there's a random grey bit at the bottom of this photo!
Cut to two years later and I've finally discovered a way to make a man's tee into a girl's tank! Hallelujah! 

I've combined ideas from a couple of blogs here, as there are a few ways of doing it. However, to do it my way (which is totally the best) you will need: 

One man's t-shirt (This was a medium, so if you're not a tiny person, you may require a bigger size. 
Scissors
Chalk

- that's it! 

Start with the chalk and mark your tee where you're going to cut it. You're going to need a dip at the neckline (both front and back), as well as cutting off the sleeves and hem. I tried on my tee while I marked it. It may be a good idea to make conservative estimates with the markings, because you can always cut more off but you can't undo it very easily!  

Cut along your chalk markings, but don't throw away the hem you've just cut off! You'll need it later :) Try your tee on again and pinch the back straps together, to get an idea of what it will look like. If it's pulling in too tightly, you may need to cut deeper arm holes and more of a dip at the back - the bottom of these two holes should be in line with each other. Keep adjusting and trying it on until it looks right. 

Once you've got it cut to the size and shape you want, it's time to tie up the back. Try on your tee and pinch the straps together where you want them to join. Then, safety pin the straps in place so you know where to start with your knotting. Take the scrap of hem you saved and thread it under the straps so that there's an even length of material either side of the safety pin. Tie a knot in the hem fabric, and keep knotting downwards until you can no longer knot! (Don't forget to take out the safety pin when you're done.)
Sorry about my foot, folks!

And here it is!

I'm absolutely in love with it (and a little bit in love with Glenky for letting me keep and mutilate his T shirt!) I saw a version of this where they tied a ribbon round the back instead of the same material, which I might try. It takes a little time to get the proportions right, but it's so easy to do that I'm going to proceed to raid the mens' section of charity shops from now on! 

Until next time, 
Satch x


Friday, 30 August 2013

Hand-Painted Magpie Tee

Hey Kids,

Satch here. 

Before we get started, the Bestie Bucket List half marathon is on the 8th of September and Salt needs sponsors! She's running for the Hannah Chamberlain Foundation, so pop on over to her donation page and do a good thing. Unfortunately, I'm not going to be able to run it this time, due to bloody health problems, so it's probably a bit cheeky to ask you to give money to the charity I was running for. However, it is a very nice charity, so if you did fancy checking it out and giving them money - just because you're lovely - you can do so here. (Anyone else notice how brilliant I am at hyperlinks now?)

Right, now that's sorted, onto crafts! A few months ago I was in a bit of a sketching mood, and ended up with this picture of a magpie: 


Ever since I decided to include a character called Magpie in a book that I'm never going to finish writing, I've been a little bit obsessed with them, and see them ALL THE TIME. I think it's God's way of telling me to stop procrastinating and just write the damn thing already, but instead I decided to turn it into a craft-pportunity. #Priorities

I love this sketch in black and white, but the original image was so colourful I couldn't help but get a bit creative with the fabric paints! 


You may get a bit of deja vu if you've read my bleach tee blog, or Salt's bold slogan tees, but let's be honest, you're reading this to procrastinate, not judge, so we'll move on.

For your hand-painted magpie tee you will need: 

A white tee (Mine was from a charity shop)
Pegs
A flat board (I used the board from the back of a big picture frame.)
Chalk/Oil Pastels
Black Fabric Paint
Blue Fabric Paint
Green Fabric Paint
A Fine Black Fabric Pen (fine as in thin, not "Damn, girl, you looking fine.") 
A Clean Tea Towel
An Iron

The first thing you need to do is stretch your tee over your board and peg it in place. The tighter it is, the easier it will be to paint. 

Then, draw on your design in chalk (don't worry, it will wash off). It's quite a time-consuming design so I couldn't be bothered to redo it once the whole thing was on, but now it's done I kinda wish the design was about an inch to the right, so make sure you're happy with the layout before you start painting. A clever person would have tried it on before painting but, alas, twas not to be. 

When you paint a new section, use a stiff paint brush to outline the edge before you fill it in. This will help you to do it more neatly. I got excited when I realised that adding a drop of water helps to spread the colour, and so ended up going somewhat over the lines, so be careful when you get to the edge. 


The head of the magie was pretty straightforward, as it's just solid black, but I really love how the colours change on the wings and tail. To make the green gradient like that, I started at the right end of the tail, and then gradually added a bit of black as I went along the tail. Again, spreading it with a watery brush helps to blend it together, just be careful! As the wings have more obvious blocks of different shades of blue, I roughly drew where the colours change in chalk before I painted. Again, start with the lighter shade, add black to get the darker colours, and then blur it together with water. 


Before you can go over any layers, or outline the wings, you need to leave the paint to dry and set the first layer with the iron. To do this, simply cover your tee with a clean tea towel, and iron on a hot setting for one to two minutes. It was at this point I tried to "paint away" the mistakes I'd made with bleach, but it just didn't work. It might be worth trying when the paint is still wet...

Once the first layer is set, go over any patchy paint jobs, and outline the design with your fabric pen. I then hand-washed my tee but threw it in the machine after that anyway because I suck at hand-washing. It came out fine, so I wouldn't bother hand-washing next time! 


I really love how it turned out (minus the mistakes). Next time I'm thinking of doing a tortoise, as they're the best animals ever. What do you guys think? Anyone know how to get rid of fabric paint mistakes? If you could comment below, it would be much-appreciated! 

Until next time, 
Satch x

Wednesday, 27 February 2013

How to Give an Old Tee New Life

Hey Kids, 

Satch here. My parents got me a sewing machine for Christmas and now I have given up TV for Lent, I have plenty of time to use it. This means that I've managed to finally do some of the little projects that have been sitting in a pile in my room for months, like this one! 


I bought this T shirt a few years ago and I absolutely love it. It's cute, it's punny and, more than that, it's ironic because I'm actually dairy intolerant! However, it's always been just a little bit too see-through for my taste (why haven't they invented a white T shirt that doesn't do that yet?) and you can't quite see but at the top it has started to go a bit yellowy and gross. However, I wasn't quite ready to throw it away so here's how I gave it a new lease of life. 

You will need: 

One old T shirt with a motif you love
Another T shirt/Vest top (preferably the same colour) 
A Sewing Maching/A needle and thread and a lot of time on your hands! 
Thread the same colour as your chosen Tee. 

Start by cutting out the bit you want to keep from your old tee. This was my first proper go on my sewing machine so I cut out the picture a bit wonky on purpose because I knew it was not going to be perfectly neat! 


Then, pin it to the new tee. Make sure you stretch both pieces of material as much as possible so it doesn't get all bunched up. 


 Then, whack it on your sewing machine and sew it in place. I used a zig-zag pattern so it would hold down the edges and not have any little flaps. If you're sewing by hand, I'd recommend doing a loop stitch but, then again, I'm no expert! Also, fair warning, that will take AGES.


 And hey presto! Even though there was a few patchy areas where it got bunched up and I missed a few stitches, I'm so pleased with the results! (And I don't much care about things looking neat anyway.)

One of a few whoopsies!

The finished product!


What do you reckon? Also, be impressed with my leggings in the photo just above - my 75-year-old Grandma chose them! Isn't she down with the kids?! 

Until next time,
Satch x

Tuesday, 29 January 2013

Bold Slogan T-Shirts


As Satch already explained in her last blog, we along with our good friend Jacklin, have the most brilliant tradition of making each other Christmas presents.

This stemmed from a time when we were all penniless students, and put in time and effort to show our love for one another instead of money. And even though we are all now employed full-time, and sadly no longer students, this has been a tradition that has stayed, and I certainly don't see my bank account complaining.

So, in the spirit of crafting - we thought we'd share this years gift creations! Satch and I had very similar gift ideas (great minds and all that...) and we're going to try and persuade Jacklin to do a cheeky blog on the gifts she crafted us too.

I got my idea when flicking through a magazine a little while back. I stumbled across a picture of a girl wearing one of those t-shirts with large lettering on them. You know the ones I mean? Some have funny phrases like 'Sex, Drugs and Sausage Rolls' and others just have the same word repeated.

They seemed like the perfect idea - relatively easy to make, and super easy to personalize to the person!


What you'll need:
 - 1 cotton t-shirt in any colour (These were from Primark - £3.50)
 - 1 pot of fabric paint in any colour (£4.95)
 - Roll of Sellotape
 - Old newspaper
 - Scissors
 - A permanent marker
 - Access to a printer and paper!


And here's how to do it.


1. DESIGN
This is the fun bit - pick the words for your t-shirt!
- I tried to think of something witty and personal to the giftee, as well as being a short enough phrase to print on the front of a t-shirt. (As I learnt, the shorter the words, the easier to create a stencil!)
- Once you've decided, get yourself on a computer and open up MS Word. You need to print out the words to use as stencils on the t-shirts, so they need to be the same size.
- The way I did this was to do it in Word Art. Pick your font, change it so that it just prints the outline, and select your size. Then copy and paste teh first stencil and just change the wording so the sizing stays consistent.

2. CREATE YOUR STENCILS
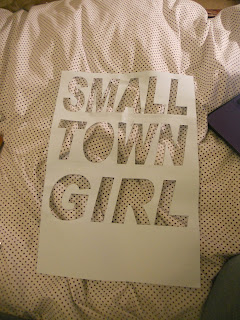
- Click print, and start cutting out the letters, making sure to keep any inner bits that you'll need to paint around later.
- I had a bit of trouble getting these neat, so after I'd cut it all out, I strengthed all the corners with sellotape.


3. PREPARE
- A bit of an obvious one, but cover the floor with newspaper as fabric paint is deisgned to paint fabric! I'm also one of the clumsiest people alive, so dressed in clothes I wouldn't mind inevitably being splattered in paint!
- Stick your stencils together, and line them up on the front of the t-shirt, then secure them down with sellotape around the edges.
- Take all your middle bits and pop a bit of sellotape looped round onto the back of each, then secure in place on the T-Shirt.
- Pop a single sheet of newspaper up the t-shirt to prevent any run through.


4. PAINT AND CREATE
- Obviously!
- Once finished, let it dry completely (usually takes a couple of hours) before you remove the stencil.
- I then got a black fabric marker and wrote around the letters to neaten up the edges, and give it a comical comic book look!


And here are the finished products:


To be honest, I'm really very chuffed with them, and they went down a treat!
The inside jokes made all the difference, and added that lovely personal touch!

Wednesday, 16 January 2013

Bleach-Painted T Shirts


Hello Friends


Satch here – a very happy 2013 to you all! I had a bit of a crafty Christmas this year so there will be another blog or two following this one in the festive vein. I know it’s January, but let’s keep the spirit alive, shall we?


You may not be aware, but Salt, Jacklin and I have, in recent years, developed a bit of a Christmas tradition where we make presents for each other, instead of buying them. Seeing as I only became employed at the beginning of December, I was very thankful for this tradition this year and they won’t mind me telling you, I did their presents on a SUPER low budget! I nicked this idea off of another blog, but it was so cool I just had to try it and I’m quite happy with the results.


To make one of these bad boys of your own you will need:
A T shirt or Vest top 
A Large Piece of Cardboard
Clothes Pegs
Chalk
Household Bleach
A Glass Bowl
A Sturdy Paint Brush (I ruined 2 of mine doing this!) 

Start by stretching your top around the cardboard and peg it in place. This will stop the bleach from leaking through to the other side, and make it easier to do your design. Then, draw your design onto the top with chalk (which will wash off later). I had a cheeky practise with my designs on paper first. You can rub out the chalk and make changes, but too many lines makes it confusing and you don't want to make a mistake. 

Then, put a bit of bleach in the glass bowl, dip in your paintbrush and go over the design. It should only take a few seconds to come through. It's hard to get it all even so simply go over the patchy bits again until it looks how you want it. However, on Jacklin's top a few of the letters just didn't show up so I over did it and now some of them are a little bit too big: 


After you've finished bleach painting, leave it outside or in a conservatory to get some sun for an hour, so the design fully sets in, and then hand wash it. Then it should be permanent and machine-washable and everything! 

As you can see, the colour of the bleach varies depending on the colour and cotton content of the top. I did another one with a camera design for my cousin Naomi (which I stupidly wrapped up before I took a picture!) on a blue top and the camera turned out pink, but the blog I got the idea from used a blue top and the design came out white, so it's really a guessing game! But the colours are always quite complementary so it works :) 

 Look out for Salt's blog about what she made for us (we ended up with surprisingly similar ideas) and we might get Jacklin in for a guest blog so she can show off about her crafty skills (I'll give you a hint, my present involved cake and darth vader - beautiful!) 

Also, Salt and I are doing a 2013 bucket list this year, which we shall post shortly and keep you updated about our progress. It's gonna be a good year :)